Made by Hand: Searching for Meaning in a Throwaway World
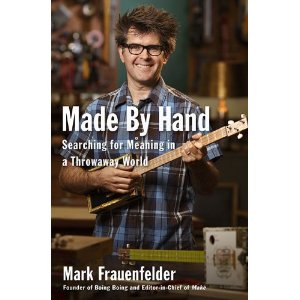 Memorial Day weekend is a good time to catch up on reading, so I picked up this DIY manifesto by MAKE editor and Boing-Boing founder Mark Frauenfelder. It was an easy and pleasurable read.
The book starts off dramatically with the author’s decision to move his family to a South Pacific island. He quickly learns, along with anyone who has ever read The Sex Lives of Cannibals, that these islands are third-world countries with rusted buildings and sub-standard medical care. He moves back within four months. He decides to find another path to a meaningful life — one that will still allow him the comforts of U.S. suburbia.
His solution to this problem was to explore ways of making his own food and tools and educational experiences for his kids. The book repeats a pattern for most of this: he finds a really interesting person who is living at the extreme, documents their lifestyle, then takes a more moderate approach himself. As with the island excursion, he is willing to try some truly unusual projects, which mostly don’t last. This makes the book accessible for people for me who are never going to give up going to the supermarket, but still want to enjoy the satisfaction of making. And as such, he reaches some of the same compromises. No, we won’t homeschool our kids, yes we will supplement a standard school education with hand-on projects.
I have never tried to formalize my reasons for creating things. Intellectual stimulation, building new competencies, and feeling more control over the physical environment are certainly part of it. And if you are very lucky, you end up with something beautiful or entertaining. Whether one can fully claim that meaning is being added to the world, I don’t know. Unless one is fully dedicated to recycling, you will still end up buying parts and tools and driving to Home Depot. I am fully aware that I am still a consumer. No question though that it can be very satisfying.
Frauenfelder notes that the amateur science movement suffered a blow when personal computers were invented; many of the people who might have done science or DIY gravitated to this new platform. But as computers and the web have matured, many people are tiring of living a fully virtual world and want to make something tangible. I believe this is correct. I’ve certainly experienced this feeling myself, and have heard many IT colleagues and academicians say similar things. Part of me wonders, though, if this too will be a phase. Frauenfelder has shown himself to be a genius at finding trends and was a key part of the Internet bubble. According to the book he has moved into DIY for the last 18 months — not long. Will whittling spoons still be meaningful ten years later, or will it seem a poor use of time?
Ironically for a book that celebrates handcrafted objects, I experienced it in virtual form. I alternated between my Kindle and the Kindle App for the Blackberry. They both performed admirably. I had never really used the Kindle App for the Blackberry before. Since my Blackberry goes everywhere with me, and has a backlight for nighttime reading, this means I will never be away from a vast library. That is both an exciting and daunting prospect. It is yet another opportunity for the virtual world to overwhelm the real one.
Potato batteries
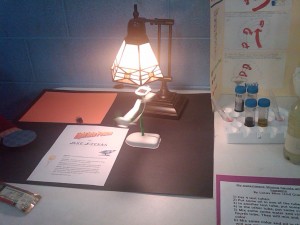
Laurel went through a rite of passage last week, her first science fair. This was a non-competitive event, an Arts and Technology Night organized by her school. She really wanted to exhibit something so we got her signed up.
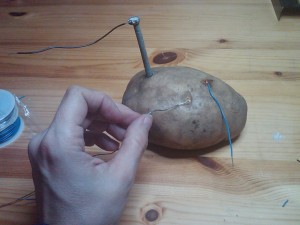
After looking online for ideas, Laurel chose to do food batteries. Batteries are very simple — two electrodes and an electrolyte will make one. Lemons, tomatoes, potatoes, and a variety of other foods will work. We opted for potatoes as a stable material and minimally corrosive with respect to the electrodes (meaning that they last for a long time). We used galvanized nails — nails covered with zinc — for one electrode; and pennies for the other. Alligator clips were used to connect multiple potatoes in series.
I thought this would be a pretty trivial project, but as usual, there were some wrinkles. The coating on the nails was thick enough to impede conductivity with the alligator clips. Version one, I filed off part of the coating; version two, I broke out the Dremel and used the wire brush to get the coating off, a much prettier result. We initially tried copper wire from the craft store for the copper electrode, but that had some varnish on it that caused problems. The pennies worked well as a substitute.
Each potato yields approximately 0.7V. I was impressed with this; a typical small battery gives 1.5V. But potatoes are extremely current limited. At best, they yield 0.2-0.4mA. I ordered some low-current LEDs, and did get them to light up. They are extremely small and dim so I didn’t think this would be an effective display. A little hunting on YouTube showed various potato battery videos. A few people were using calculators as the powered item. It turns out, those liquid crystal displays use very little current — and as I thought about it, I hadn’t changed my calculator batteries in years. I opened it up, removed the batteries, attached the alligator clips to the terminals, and voilà. A working calculator with an empty battery chamber.
I was very happy to have this working. The next day we looked at it again and it didn’t work. There was voltage but no current. I believe this is because the punctured skin of the potato caused it to dry out in that area. By moving the electrodes to new spots, the potato “revived” and became useful again. This meant that we would have to assemble the project on-site the evening of the show.
The alligator clips tended to fall off the calculator. Not too surprising, as the calculator was not designed to be powered this way. I made the mistake of trying to solder on a wire to the negative terminal, and was a little bit careless as to method, ultimately ruining the calculator. A sad moment, as this calculator had been with me for 15 years. A quick trip to the drugstore got us another one for $5. For the experiment, this new one was an improvement: a larger display, and very low current / power requirements. It can run off either a coin battery or solar power, with power consumption in the microwatt range. I think if you breathe on it, it will run. At any rate the potatoes certainly had no trouble with it. I taped over the solar cell and once again we were in business.
Some adventures getting the project to the school and set up, which I will skip over. Lesson there, as always, personal involvement is important. I was there early, definitely a good thing. After we were ready, I wandered around and saw a boy whose project involved the exact same solar robot that Holly and I had recently made. Like us, he had difficulty with the power connections, and was looking rather despondent. Having been through this I was in a perfect position to help, and I got it hooked up for him. His mother was very grateful!
Laurel was one of four kindergarten displays, and she was the only one from her class. Supposedly the science exhibition was to start at 8pm, but since this was the most interesting part of the evening (in my humble opinion) people were wandering in from 6:30 on. Kids loved playing with the calculator, so we had to keep an eye on it, as the clips would periodically come off. The principal stopped by and had a nice conversation with Laurel about her project.
Our idea was not completely original. There were two other food battery projects. One was another potato battery one, but done from a kit, so they had nice zinc and copper strips, as well as a few small electronic devices to show it off. The other was a bit more original (though still starting from a kit I think) and used a variety of batteries, including potatoes, lemons, soil, and the human body. There were some excellent experiments at the show. One family had four kids with displays, one of them the potato battery kit. The father stopped by and was very complimentary, saying (correctly) that it is harder to do something homegrown than a packaged project.
But, packaged projects have some advantages, and we discovered this. Our power connection failed after excessive use, pulling one of the terminals out of the calculator and rendering it inoperable. Laurel was extremely upset. We had redundant supplies for everything except the calculator — the drugstore only had one — so that was the end of the demonstrations. Still, we had a great time and learned a lot. I’m sure there will be more science fairs in our future!
Playing with a solar robot
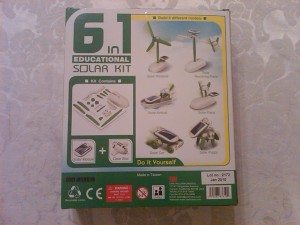
Holly has been begging to build her own robot ever since I made Robie. Fortunately there are some excellent options for kid-friendly robot kits. After browsing the MakerShed we decided to get the 6-in-1 Educational Solar Robotic Kit.
This was a good choice. As the box states you can make six different robots. We’ve done three so far and it is extremely easy to put each one together. I did run into one annoying problem with the kit. The power connections are made by forcing stranded wires through a tight coil spring. To switch configurations, you need to do it four times. It is not always easy to do. Out on the playground, the force involved shook up some components inside the gearbox, reducing the clearance so that the rotor wouldn’t turn. At first I though the solar cell had died. Eventually I realized that a (fairly quick) rebuild of the gearbox would fix it, but it was a frustrating experience.
Power connections often seem to be the most problematic part of a project…why is that I wonder?
I was impressed with the high RPM of the gearbox. This thing can really go! Take a look at the video of the solar car:
Of course, it does not have a lot of torque. The car does not do very well uphill.
We’ve had a lot of fun with this, and for $19.95, it was quite a deal.
More toys for the workshop
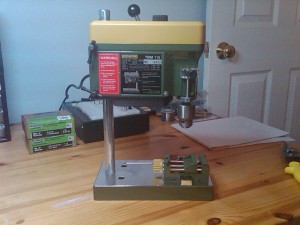
During my robot build, I was constantly wishing for a drill press. I put off purchasing one because I couldn’t decide if I really needed a full-sized press, where to put it, etc. I eventually stumbled on a drill press that is small enough to fit on (or be stored under) my worktable, but has enough features to do everything short of very large pieces or thick metal. I am now the proud owner of a Proxxon 38128 TBM Bench Drill Machine. It weights only 8.4 lbs and has a work table of 8 21/32″ x 4 23/32″. The press has three spindle speeds of 1800, 4700, and 8500 rpm.
The drill press ships with steel collets to hold the bits, but as many people do I want the convenience of a keyed chuck. Amazon recommends — and offers as a bundled deal — the keyed chuck made by Proxxon. But, Proxxon is a German company, and their chuck is metric. It will hold bit shafts up to 6 mm, or 15/64″. In the U.S. it is very useful to have 1/4″ (16/64″) shaft sizes available. So with some trepidation, I ordered the Milwaukee 48-66-0817 3/8-Inch Keyed Chuck instead. I am happy to say that it fits well.
Here is a pic of the drill press, ready to go. A vise is sitting on the worktable, useful for smaller pieces, and the keyed chuck is on. A greater work distance can be obtained by removing the vise and/or switching back to a collet.
In my optimism I thought I might be able to do some light milling with this as well, and ordered the KT 70 compound table to go with it. A little research has convinced me this would be a bad idea; drill presses are good at withstanding vertical pressure, but mills apply horizontal pressure as well, and milling can ruin a drill press. So, the compound table will be returned. Mills are considerably more expensive, so it will probably be a little while before I get one.
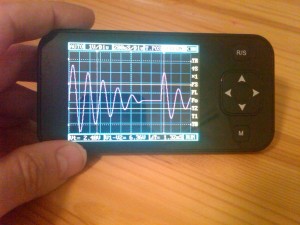
On the electronics side, I picked up a DSO Nano from SparkFun. This is an oscillosope, with lots of technical specs, but the picture will show the best part of it:
This scope looks cool! When I saw the pictures — and read the good reviews — I had to get it. I haven’t used an oscilloscope in decades and I don’t know the subtleties here, but the interface is fairly intuitive and I was able to do some basic operations immediately.
Now the question is, what to do with this stuff. The Speed Vest and Robie the Robot were both major projects. I don’t have anything that complex to do now. That is partly due to the fact that Bike Virginia is coming up at the end of June, and my training schedule has gotten more intense. I’ve been doing some smaller projects with the kids, and I do have some upgrades planned for Robie. For the upgrades and just to play around with some ideas, I recently ordered various components that caught my eye — including a couple of Arduino Pro Minis and a Miga Nanomuscle. The Nanomuscle is the size of a thumb tack and can lift a bowling ball. A rope-climbing robot might be neat…
Automating Windows
I have a great job (read: limited hours, excellent pay) but one of things I like least about it are the repetitive IT tasks I have to do. Things are stable enough that a full sysadmin would be a waste of money, but still, certain things have to get done. For a long time I have used Remember the Milk, an excellent free service that reminds me as needed for repetitive tasks like cleaning out log files, checking disk space, changing passwords — good for personal items, too — but I still have to do the tasks. My dream has been to find a way where I can automate them. UNIX of course would offer this capability, though not always in the most user-friendly way.
Today I was confronted with a situation where a task we have been doing weekly now needs to be done daily. I didn’t feel like the hassle of writing code, or doing it manually every day myself. Because the task is done on our production server, this is not something our customer service department can do. It involves running a database procedure and e-mailing the date-stamped file to a mailing house.
A friend of mine had mentioned a program that allowed you to write macros in Windows. I wanted to find something slightly more robust but with the same idea of scripting a sequence of events. And, without having to write any scripts. After hunting around I found a program called WinAutomation. This has a nice little GUI where you can drag and drop actions like “Send E-mail” and “Delete Files” into your job. It has flow control and limited but serviceable error handling.
I was able to learn the program and write my mailer job in a few hours. The hard part, as with many programs, was thinking through and handling each possible error. I was so thrilled by this that I decided to tackle another tedious job, deleting Tomcat log files. Some of these roll over each day, while others are date-stamped with the time the server started but can’t be deleted — so for those, the newest version needs to be left alone. Strangely enough this job was harder to write than the first one, but eventually I got that done too.
I’m very happy and looking forward to writing more jobs. The price is pretty reasonable too — $129 for the standard program, or $199 to include the compiler feature which allows you to turn a job into an executable that will run on computers without WinAutomation. As with most of these things, you can get a free Window scripting alternative. But it doesn’t have a GUI, and if I’m going to learn a new language, I might as well code it the old way.
WinAutomation apparently has been offering bloggers free licenses to review the product. Alas, I am not in that category :). Just thought it was a neat product.
Robie the Robot lives!
A few days ago I put in the obstacle avoidance programming for the coasterbot. Almost immediately, he acquired a real personality. The algorithm works incredibly well. Even though the first version of my code had significant bugs — typos, forgetting that moving the sensor servo takes a finite amount of time, etc. — he was able to navigate quite competently. And after some corrections, he did even better.
There were some minor hardware issues I discovered. The Solarbotics voltage regulator had a high-resistance short which would cause the 9V battery to drain after a day or so, even if the robot was turned off. I was able to get rid of it but that drove me crazy for a while — I wondered why I had to keep recharging the battery!
Also, solderless breadboards have their limitations. The Ardweeny has a nasty habit of tilting in the board, disconnecting some pins and resulting in a robot that almost works; and manipulating the bot can make it tilt back, “fixing” the problem. Again, for a while I blamed the batteries until I figured out the true cause. Other breadboard connections would sometimes work loose, particularly for the PING sensor or servo. I soldered solid-gauge wire onto the stranded wires of the AAA case in order to make that connection more solid.
So, on to the fun stuff — a working robot! Here are some videos showing him in action.
Kids Playing with Coasterbot. The title says it all. The kids really had fun with this.
Official “Contest Entry” Video. Robie navigates his way around a room and out of some tight corners. I learned some features of Microsoft Movie Maker (free with Windows) in making this. Note the title sequence and credits. 🙂
I have written up a detailed summary of Robie’s construction and operation, including schematic, bill of materials, and more links to photos and videos. Please check that out if you want more information.
Coasterbot gets a pair of eyes
I was featured in MAKE Robot Dispatch #7 — thanks guys! Hard to believe that there is less than a week left in the contest.
One of the requirements of the contest is for the robot to do some obstacle avoidance. The Jameco bundle came with some switches to do bump sensing. While this might be the cheapest solution, it certainly isn’t the simplest. I decided to spend a little bit for a PING))) ultrasonic sensor. This fires a short ultrasonic pulse to determine the distance to the object directly in front of it. I also purchased a mounting bracket kit so that I could rotate the sensor in different directions. (This turned out to be a bit of overkill — I didn’t need the brackets, just the servo itself. But the servo extension cable was useful.)
This was a pretty easy install. No soldering required, I just used 22-gauge wire to plug into the female headers and the breadboard. I needed to run the servos off the 6V batteries in order to get sufficient power. Also, the Arduino servo library requires pin 9 or 10 to be used, which I did not immediately appreciate. For the Ping sensor, there is a user-contributed library which worked fine, again, after I figured out the right pin to use. Pins 0 and 1 are grabbed by Serial which I always use to debug; and pin 2 also seemed to be in use (because it’s an interrupt?), but pin 3 was fine. I am very glad the sensor has a green LED to show when it is firing, otherwise that could have been nasty to debug.
In the video below, the robot is moving, turning the sensor, and taking readings. This shows that the power supply is sufficient, at least with relatively fresh batteries.
There is no obstacle avoidance yet. But with all the hardware in place, this is purely a matter of programming. I am confident that I can get it working, though elegance may be another story. I have some ideas for artistic design which I am hoping to work on tomorrow, with the help of my four year-old daughter.
Coasterbot moves!
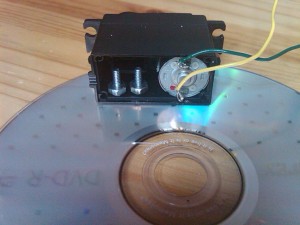
With the electronics done, it was time to go back and work on the chassis. As before, the DVDs are linked with screws. I wanted the servos to be firmly attached. Since we removed the controller units, this left a lot of empty space in the case, allowing for this type of attachment:
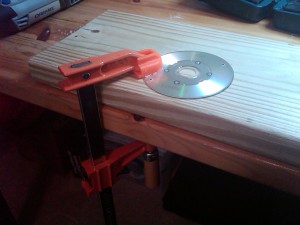
I still don’t have a real drill press (sigh) but I did get some extra pieces of wood so that I could make things a little bit more precise.
After attaching the servos, I decided to follow the steps in MAKE: The one hour coasterbot in order to move things along. This meant sticking things on with foam tape, a good method at this point as I may make position changes depending on the art that gets added. I wired up the solderless breadboard with the voltage regulator, Ardweeny, and H-bridge L293D chip exactly as described in the article. I also downloaded their Arduino sketch, which makes the robot perform a set of maneuvers. My body structure is a little different, keeping all the electronics on one CD rather than two.
Now, time to make the bot move! At first, this went pretty well. When I switched everything on, the robot started its pattern of movements, as defined by the sketch. But after a few minutes, the wheels started to move more slowly. Then they stopped moving backwards. Then, they completely stopped.
At first I thought this was a battery issue. After trying multiple sets of batteries and testing the output voltage, it became clear that wasn’t the case. Each time, the same thing happened. If I walked away from the bot for a long time, it would work again, then stop working.
A tip in the MAKE forums suggested that I look to see if anything was overheating. Something was — the L293D chip. This is an H-bridge, used to drive the motors. Typically DC motors need to have a voltage applied across them to make them move. To make them go in the opposite direction, the sign of the voltage must be reversed. H-bridges provide this capability in a convenient package. Since this one was overheating, I thought there might be an issue with current being overdrawn. Hooking up the motors directly to a power source, I could see they were drawing 150mA apiece, or 300mA total — even with no weight on them — while the L293D is rated for 500mA.
I decided to remove the wheels altogether. Suddenly the motors were turning a lot more rapidly, and the current draw was down to 70mA each. Turns out that the wheels were too far in on the very short coupler shaft. When the shaft turned, the wheels rubbed against the side of the case, causing extra work for the motor. Servo motors generally deal with precise placements and don’t worry too much about friction. For continuous motion, however, that quickly becomes an issue. I loosened the screws to move the wheels out a bit, and then the coasterbot was able to do a fast little dance, as shown in the video below.
The two “tail” DVDs can rotate with respect to the main body. Since this pattern goes clockwise, the tail is curved that way throughout. I haven’t figured out what their functional purpose will be yet, but if nothing else they provide extra surface space for instrumentation or loads.
Next up: add some sensors so that the robot can navigate the space on its own. I have a PING))) ultrasonic sensor (used to measure distance from objects) as well as a mounting bracket, and a servo motor to point it in different directions.
Robot Fest 2010
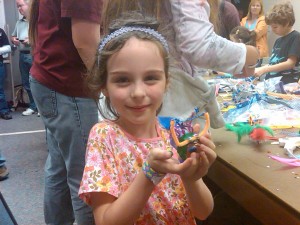
 Today the family and I went to Robot Fest, held at the National Electronics Museum. I had been looking forward to this for a long time, and I wasn’t disappointed. There were any number of fun displays and workshops, including in no particular order: compressed-air rocket launches, Lego robots to control and build, a vocoder that makes you sound like a robot, plush toys coming to life with embedded movement kits, a Vibrabot workshop (Laurel built one), Martin Luther King speaking with facial expressions modeled by electroluminescent wire, and several 3-D printers to look at.
The kids loved it. Laurel soldered for the first time to make the Vibrabot. Her paper rocket also went much higher than average — I think it was due to our extra tape on the nose cone and carefully parallel fins. Holly diligently followed the directions to build a Lego robot, and insisted on wearing her robot shirt today.
I was very happy to meet some HacDC cohorts in real life, including Andrew, Tim, Daniel, Mark, Nikolas, and Elliott. Nice folks and I look forward to hanging out with them more at the Microcontroller Mondays. I have yet to make it out there for one of those, but maybe tomorrow…I could use some help debugging the coasterbot.
There are many more pictures to see in my photo album.
A nice coasterbot surprise
This morning, I got an e-mail from YouTube asking me to sign up for revenue sharing on my “popular video” of coasterbot folding. I didn’t think too much about this, because that was a 10 second video I shot one-handed. I hadn’t even bothered adding an audio track, or a link back here. The only reason I added it to YouTube at all was for a convenient way to embed it in the blog. There probably is a way for me to upload video here directly…but why use my hosted server space when YouTube will take it free?
At any rate, I just assumed this was part of GooTube’s plan to populate the world with ads. But, when I looked at my video, I saw that it had over 1,400 hits. That was a surprise. After some digging, I discovered that we had been featured (again) in a MAKE: Online blog post. Unlike the Speed Vest entry though, Gareth didn’t know this video came for me or that it was connected to a blog. So it’s a more anonymous credit. Still exciting, but lesson learned — I will tag all future public offerings with a link. And I’m now allowing YouTube to show my real name.
The idea of making the DVDs fold up is an interesting one. It’s been my goal all along to avoid doing the standard stacked CD design. I think it is possible to justify a longer body depending on the robot’s function and artistic goals. Some rotational freedom is appealing, too. Full folding, though — that’s tough, unless a human does it, and I am having trouble thinking of a good reason to put it in there.
I plan to finish a basic version of the bot in time for the deadline. The programming may be a challenge. I have been very impressed by the various contestants who have built bots within days. It takes a lot longer when you are doing it for the first time. When I get version one up and running, I hope to come back and explore some more exotic options.

