Stanford and Sebastian Thrun offering more free online classes
I posted previously about the free AI class taught last fall by Sebastian Thrun and Peter Norvig. It was a marvelous experience. I learned quite a bit, and completed all the homework and tests, with a perfect score on the final exam (which was not terribly hard). Well worth the time investment. The video format was far more enjoyable than I expected and in many ways was an improvement over a live lecture. It felt intimate and the ability to rewind is invaluable!
So I was delighted to see that new courses are being offered for the spring semester. An excellent summary of them can be found here. (Be sure to scroll all the way down, as there are some important updates at the bottom.) The list includes computer science, entrepreneurship, robotics, and many other topics that all look incredibly interesting. As mentioned in my previous post there are also archived courses available through Stanford Engineering Everywhere, though there would not be any grading for those.
An interesting note here is that Sebastian Thrun is offering his courses through his new online education venture, Udacity, rather than Stanford. Apparently he has chosen his Google position over his professorship at Stanford, and given up his tenure. It appears to have been an amicable split. The AI class attracted over 100,000 students. Thrun discovered that even the Stanford attendees preferred to watch online, rather than live; his lectures dwindled from 200 to 50 over the course of the semester. I don’t blame them. As with the Stanford classes, Udacity’s courses are free, but without any sort of accreditation. Starting February 20 they will begin “Building a Search Engine” (for programming novices) and “Programming a Robotic Car” (programming experience required).
I would very much like to take the robotic car course, and Stanford’s Machine Learning. However, I recently committed to a robotics competition in April, developments are happening at work, and in short this is not the perfect time. But good news: the Udacity courses will be offered again, starting April 16. Now that is flexibility! Thrilling. Udacity has 8 more courses listed as “coming soon” and I fervently hope they do. Democratization of scientific education is something I feel passionate about.
The Stanford courses are tied to their academic schedule and only offered “live” once or twice a year, so if you are interested in those I recommend checking them out now — they start soon.
Experimenting with Sous-Vide Cooking
For the holidays, I asked my husband to get me an item from the Seattle Food Geek Gift Guide. I’ve been doing a great deal more cooking in the past months, so much that it has distracted me from other maker projects. At its best, cooking fulfills some of the same needs: learning something new, figuring out problems, discovering better ways to do things, and creating something beautiful. Best of all, it is useful! Make something delicious and your family is happy; and every night is an opportunity for a new “project”. Still, there are many excellent cooking blogs in the world, so I did not think there was a need for posts on that.
However, the gift item my husband chose was the Sous Vide Supreme. And sous vide cooking is both new enough and geeky enough that I thought it might be of interest. I first learned of it in “Cooking for Geeks” by Jeff Potter. Basically, it is a precision temperature-controlled fluid bath. Foods are (generally) placed in a plastic bag, then the air is removed and the bag vacuum-sealed. The food bag is placed in the bath, and sits at the desired internal temperature for a long time. This is different than oven roasting where the cooking temperature is often hundreds of degrees higher than the desired final internal temperature. Thus roasting can often result in an overdone exterior and underdone interior. The high heat is required due to the inefficient heat transfer of air. But with the sous vide fluid the heat transfer is much faster. It is possible to get your fish or meat to the right temperature in a reasonable amount of time, depending on the thickness of the meat. The entire piece will be cooked evenly, and exact timing is usually not required; you can leave the food item in there quite a bit longer and it will not overcook.
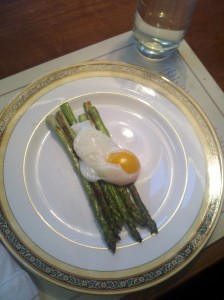
The classic item to start with is an egg, because being in a shell it doesn’t need the vacuum-sealed bag. As suggested in Jeff’s book, I put the egg in at 146F for 1 hour. Near the end of the hour, I sauteed some asparagus. After that, I took the egg out and did the optional step of cracking the egg into a cup of very hot water (to set the whites more) then took it out immediately with a slotted spoon and put it over the asparagus. The egg was amazing. The yolk was like a custard, ever so slightly runny, and the whites were soft. The look of it was very unique too. It’s easy to play with the temperature to get the egg the way you like, and for slow-cooked eggs the results will be very consistent. Again, exact timing is not required. Here is a picture of the result.
It is possible to cook eggs quickly as well; I’ve done them at 167F for 15 minutes the last few mornings, and since that is much higher than the desired internal temperature, precise timing becomes important. That said, the eggs are far more consistent this way than using boiling water or the microwave!
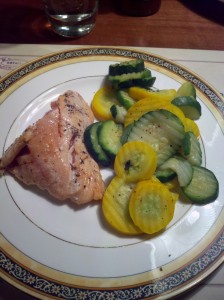
Having had success with the egg, my next test was salmon. I had heard this was a classic sous vide dish. I bought 3 8oz filets, and put 3 tablespoons of olive oil in small cups into the freezer briefly to set them into a gel. I then bagged each salmon with the olive oil gel and cooked it for 40 minutes at 122F.
The results were outstanding. I’ve never had such good fish, and the edges were as moist as the interior. Coming out of the bag, it looked raw, which is normal for sous vide. I used a pan to sear each side for 30 seconds, then we all ate. Everyone loved it, especially the kids, who have begged me to make it again.
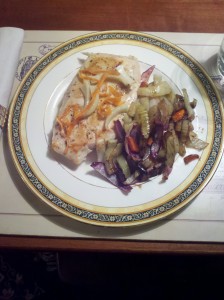
Next up, chicken breasts. These are healthy and very filling, but let’s face it, they can be dry and boring as well. I’ve figured out some good recipes by now, but I always prefer the fattier dark meat. I tried out a butter poached chicken breast with fennel recipe. Once again, the meat was extremely moist. But the sauce was not interesting enough. Chicken breasts as an entrée still require a strong flavor, whether a sauce, marinade, or dry rub.
I had better success with cooking a large batch of chicken breasts for my lunch salads. I’ve avoided making these in bulk in the oven because it is too hard to guarantee uniformity, and the last thing I wanted was a large amount of dry or underdone chicken on hand. I rely on leftovers from dinner instead which is a bit hit or miss. In the sous vide making the breasts was very easy, throw the bag in for a few hours and that was it — and the results were excellent.
The concept of cooking decoupled from time (mostly) is a fascinating one. I usually focus on cooking the protein perfectly and keep the side as simple as possible because the timing issues are such a pain. But the sous vide frees me up to make a more interesting side dish. The butter poached chicken may have been a bit bland, but the roasted fennel, carrot, and onion side I served with it was a hit. And I would never had made that under normal circumstances. One can go a lot further than this. Make your dish ahead of time, keep it in the vacuum sealed bag, then chill or freeze it. Just warm it up again when you are ready to eat. Or, cook multiple items at the same time. If the higher temperature ones go in first, they can stay in while the lower temperature ones are there too — they won’t overcook. And everything is all warm and ready to go when you want to eat. No doubt this utility is why the sous vide became popular in the restaurant world.
This situation has some similarities to a slow cooker, where you also have the luxury of putting something together and letting it sit for hours. In the slow cooker you must use a sauce, the meat will shrink, there are some practical limitations in terms of how long it can stay in, and the cook/chill option is not generally available. Nevertheless the slow cooker is a wonderful tool.
Because sous vide is fairly new to home chefs, creativity is required in figuring out how to apply recipes to it. One idea that occurred to me for tonight was mashed potatoes. To get the richest flavor from the potatoes, it’s best to boil them with the skins on. But you then have the problem of getting the skins off afterwards without letting the potatoes cool down too much. And generally, it all must be precisely timed: if your guests aren’t there on time, you will be stuck with cold potatoes. For Thanksgiving, I found a make ahead recipe which got around the timing problem. The sous vide seemed to have the potential to solve both skin and timing. I peeled the potatoes, sealed them up, and put them in at 184F. When the rest of the meal — stout-braised beef short ribs — was ready, I mashed the potatoes with butter, milk, and sour cream. They were exactly the right consistency and, again, delicious. Bonus: I bagged some peeled, halved pears and cooked them along with the potatoes. When dinner was over I unsealed the poached pears and drizzled on some honey and blue cheese crumbles. A nice hot dessert, yum.
Similar to a slow cooker, the sous vide will not brown the outside of the meat. Browning is desirable from an aesthetic and taste point of view, even if it is not the healthiest option. The easiest way to brown meat is to quickly pan sear the meat before or after cooking. The fun way, is to use a blow torch when the dish is completed! I’ve ordered a culinary blow torch, and am looking forward to trying it out.
Finally, there are some neat things that can be done with a hot water bath. I suspect I could use this to make yogurt, or culture biological samples. I have some herbal tea which needs to steep for 10 minutes, but can’t be brought to a boil again after steeping. To keep the tea warm, just sit the mug in the sous vide. Etc. There are many more uses I’m sure, and I’m looking forward to exploring them.
Taking Stanford’s Artificial Intelligence course
This week marks the beginning of Stanford’s introductory course in Artificial Intelligence, taught by Sebastian Thrun and Peter Norvig. This is the same course being given live at Stanford’s campus as CS221. Enrollment is free, and includes video lectures, quizzes, and (optionally) homework and exams. I have signed up for the full boat, they say it will take 10 hours a week. No course credit for those outside of Stanford, but we will be ranked against the 145,000 other people signed up for the class, and will get a letter of accomplishment.
I just watched the first unit. I was afraid the videos would be dry, but they were fairly pleasant to watch. It is not quite the same as having a live person there; but there are the advantages of attending on your own schedule, and being able to rewind. Breaking the lecture up into chunks is nice as well. The quizzes in the middle of various sections keep things lively, they don’t contribute to your “grade” but are a nice way to keep you on your toes. I am looking forward to the next unit. There will be a new one each week, for a total of 10 weeks.
There is also a weekly study group meeting at HacDC. That will be an opportunity to meet with fellow humans in person.
Although the AI course has received unprecedented publicity, I’ve discovered that Stanford offers many other courses for free. They have the Stanford Engineering Everywhere initiative, which in their words includes:
- Anytime and anywhere access to complete lecture videos via streaming or downloaded media.
- Full course materials including syllabi, handouts, homework, and exams.
- Online social networking with fellow SEE students.
- Support for PCs, Macs and mobile computing devices.
I saw 13 courses on there, which include: “the three-course Introduction to Computer Science taken by the majority of Stanford’s undergraduates and seven more advanced courses in artificial intelligence and electrical engineering.” Many of these look very good.
It is very encouraging to see all of this wonderful information being made freely available. A few years ago I looked for robotics courses and could find nothing. And now, world class material is here for everyone. It makes me very hopeful for the world. Many scientific research papers, too, are being made publicly available now and not being walled off behind private journals — indeed, government grants pay for much of that research, shouldn’t a citizen be able to see it? I have missed my university membership for a long time, but I think it will become somewhat less relevant in the future.
Back to Stanford: the SEE courses are mostly archived, but in addition to the AI class there are a few others that are live this fall. They include Machine Learning and Introduction to Databases.
For more information and to sign up for AI, see http://www.ai-class.org.
A crash course in sewing
I’ve been meaning to learn to sew for a long time. I knew the basics, of course, sewing on a button, fixing a tear, and making a (crude) hem. It was clear that learning to use a sewing machine would make things much easier and provide a useful option for projects. I love engineering, and sometimes fabric is a practical and attractive solution for construction.
Maker Faire featured some beautiful sewing projects. Inspired by that, I signed up for a sewing course at G Street Fabrics. I wanted to learn enough to justify getting a sewing machine, and not take too long to do it. So I signed up for the intensive version of Beginning Sewing I, only two days, but 6 hours per day. Our goal was to finish two projects: a tote bag, and pajama bottoms. This went start to finish. We learned how to select fabric and interfacing, purchased a beginner’s kit, selected and understood a pattern, pinned, steamed, and operated the sewing machine.
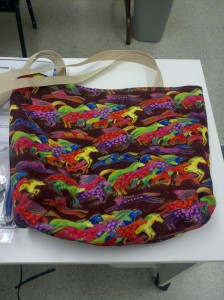
I finished in less than 12 hours, but it was a challenging experience both mentally and physically. The sewing part was relatively quick, thanks to the machine. The bulk of our time was spent ironing, pinning, and cutting, all of which needed to be done with a certain amount of precision to ensure good results. Six hours was a long time to be doing this each day, and I began to appreciate (in a very small way) what working in a sweatshop must be like. The results, though, were extremely satisfying. The first project was a tote bag. Since it was custom made, I could choose exactly the fabrics I wanted and the precise length of the straps:
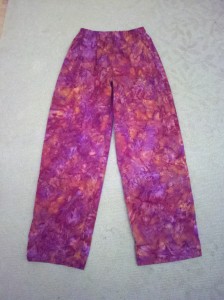
The pajama bottoms took things to a new level. They were part of a complete pattern that included an entire outfit, with a top, two types of pants, and other items. It was necessary to decode the pattern to figure how much fabric to buy, lay out shapes with the proper orientation relative to the grain of the cloth, to use different stitches for inner and outer seams, measure and create a hem. Much of the time one operates in a weird reverse geometry world. I have fairly good spatial abilities, but until the end I could not see how on earth these were going to turn into pants.
My primary interest in sewing is for crafts, but I quickly saw the advantage of made-to-measure clothing. These bottoms fit me like a glove, and in exactly the fabric I wanted. They are the best pj bottoms I’ve owned, and considering this was a beginning project that is saying a lot. I now understand why people make their own clothes. Financially, it is not a bargain in terms of time or materials — good cloth is priced accordingly, unless you are clever about sales. But the results can be stunning and I will probably go back for further courses on clothing.
In the meantime, I have purchased a sewing machine: the Brother PC-210 PRW Limited Edition Project Runway Sewing Machine. That should arrive tomorrow. I have a few outfits where seams are coming loose…and Halloween is coming up. I suspect the kids and I will find some fun things to do!
A visit to Maker Faire
Last weekend we went to Maker Faire at the New York Hall of Science. This was a repeat visit for us, and I wondered if we would see anything new or just a repeat of last year. Good news: lots of new things and we all had a great time.
The Faire has gotten a lot of coverage so I won’t even try to be comprehensive here. This year I felt much better organized. The Android Maker Faire app was a big help, though a bit incomplete, and crowd control was better. We successfully hit some of the classic shows like Arc Attack and the Life-size Mousetrap. As always though, the true finds came from just wandering around.
Things that caught my eye:
- An Arduino-controlled sous-vide kit for only $80
- Shapeways, a 3-D printing service. Send them a file, and they’ll print it for you. Or, buy objects from other designers. You can skip this and buy your own 3-D printer of course, but they are finicky and most end-products still look like cheap plastic to me. Shapeways allows for metal and high-end effects.
- Scratch, a programming language for kids developed at MIT. Laurel really wants to learn how to program. I brought her to a demo of this and could hardly tear her away later. It is a graphical programming environment and easy to use.
- New Arduino developments presented by Massimo Banzi, head of the Arduino team. He outlined future boards, the release of Arduino 1.0, and new IDEs in progress.
- Crowdsourcing UAVs. DARPA wants you to design a drone, and win $100k in the process. There’s a lot more to this and if I had any experience at all in this area, I’d be doing it — it looks like a blast.
- Hacking autism, a community project to make software that allows autistic children to communicate better and have an improved quality of life. Anyone can participate, either with ideas or apps. See their site for more details. They are holding a hackathon in Cupertino on October 10 (I think).
- Kinect hacking. Microsoft uses this controller to detect body position for games without joysticks. Hackers have found many, many other uses for this powerful and relatively inexpensive tool. At first Microsoft opposed the idea, but after many open source kits were released Microsoft even put out their own SDK (though I recommend you don’t use it, their legal restrictions are severe; use the other options). The Turtlebot, which I’ve been thinking about getting, has a Kinect as its main sensor.
No chariot races, nearly naked people, or Martha Stewart this year. I missed them.
I was inspired enough by all this to sign up for some things at home. There is a fabrication lab about an hour from my home, which has a ShopBot router, a CNC milling machine, a UPrint 3-D printer, Roland Vinyl cutter, Epilog laser cutter and a variety of design software. After taking a class, anyone can use the machines. I’m signed up for it next Monday. On Thursday and Friday, I’ll be learning another type of craft: sewing. It’s 12 hours worth of instruction, so I assume we will get a fairly thorough grounding. I’ve used needle and thread before many times, but never a sewing machine. If this goes well I’ll get one for me and the kids.
Our pictures from the Faire: Maker Faire NY 2011 photo album.
Tour de France, Day 3 – Alpe d’Huez and TDF Stage 19
Day 3: Col du Lauteret to Alpe d’Huez to Freney d’Oisans. 48 miles. Total ascent: 5,448 ft
For many of us, the highlight of the 5-day trip was the promise of a climb up Alpe d’Huez. This legendary climb with 21 switchbacks has long been associated with drama and skill at the Tour, and is often a definitive stage in determining the winner. We had all seen the mountain on TV, lined with spectators cheering on the racers. Today it would be our turn.
We would be riding a few hours ahead of the peloton. Stages in the Tour generally begin in the afternoon, a surprising discovery for those of us used to doing summer events early in the morning to beat the heat. We had been warned that the police would start pulling cyclists from the road at 11am. An “average cyclist” should be able to make it up in less than two hours. Therefore, our goal was to reach the base of Alpe d’Huez by 9am. This meant a 7am departure, and a cold start. As usual it was necessary to use layers to balance out the chilly descents and the warm climbs. Today I used the old trick of putting a newspaper under my jersey for the downhill to block the wind. It worked rather well.
The ride began with a 24 mile descent. I don’t think I have ever experienced such a long downhill on a ride, and that was an event in itself. We went from our hotel on the top of Col du Lauteret down through La Grave, joining the route that the peloton would take later. As always, magnificent mountain views were on display as we went down. We also saw rivers and stone bridges. As descents go this was fun and easy, but one tunnel was very unnerving. The guides warned us that a section of it was unlit; our blinky lights would keep us visible but without traffic we wouldn’t be able to see. This was true. For a short section it was completely dark. I could not see anything, including the ground. Nothing to do but keep going. It’s hard to imagine 50 riders coming through here at once, yet that’s what the pros do.
Soon enough, we were at the base of Alpe d’Huez. The steepest section is at the bottom. There were a large number of cyclists, and some of them got into trouble early. Unlike the country roads we’d been on, which were populated with lean and fast riders, this event had clearly attracted a number of amateurs. One of the challenges was avoiding collisions with other riders who showed little hesitation in stopping, or passing on either side without warning.
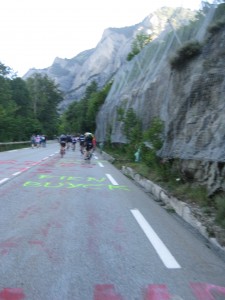
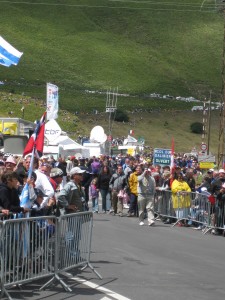
Spectators had come to stake out their spots early. Alpe d’Huez has 21 switchbacks, and each one was decorated. The road was painted with names of racers and flags from different countries. Some of the artwork was quite elaborate. Other groups had set up barbecues, stands, and loud music.
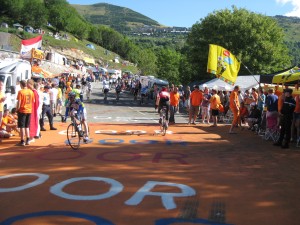
The Dutch are famous for their Alpe d’Huez parties, wearing orange and having a good time. Had I not been riding, it would have been tempting to stop and get a beer. As it was, I just took a picture:
I’d been warned that people would “help” get me up the mountain, but in truth no one bothered me — just got some cheers and thumbs up. When I went by the Rapha van, the fellow there gave me a good solid push up the hill. (I always did like their clothing.)
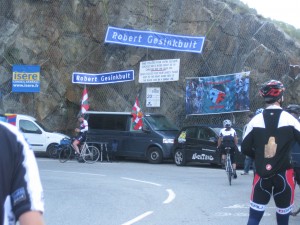
Near the top of the mountain it got more crowded. The course was lined with metal barriers for the last few kilometers. There were also some trucks and buses moving around. Several times I had to get off the bike to move through. At the end I turned off and reached the Trek viewing area.
Alpe d’Huez is 13.8km (8.6 miles) long, with an average grade of 8%. It may disappoint everyone for me to say this, but it isn’t all that hard. Of course, I did not come anywhere near Lance’s time of 37 minutes, nor was I forced to race up it after biking 100 miles against the pros. Yet it is certainly possible for an amateur to complete the course with reasonable training and body size.
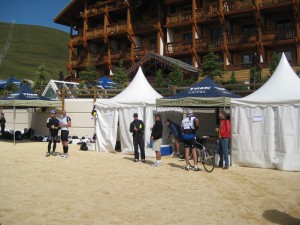
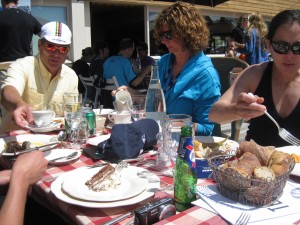
We all came in well before the 11am cutoff. Our day bags had been sent up the day before, so we were able to change into fresh clothes. Some snacks and drinks were available right away. At noon, we sat down at the hotel terrace for a great lunch.
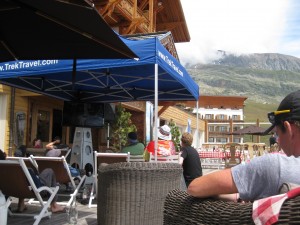
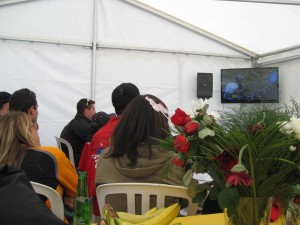
The stage had not yet started, and we had a few more hours before the first riders were due to appear. After lunch in the warm sun, I suddenly felt tired, and plopped down for a nap in a nearby chaise. Trek had set up TVs inside and outside for us to watch the stage and it was very comfortable. There was more food from the lunch available, and free (non-alcoholic) drinks. There were some celebrities around our area too; racers and high-powered executives.
The TV coverage was from a French station, and as such, was very focused on Thomas Voeckler, destined to lose the yellow jersey today. You might not know anything else about the stage, but you always knew where Voeckler was.
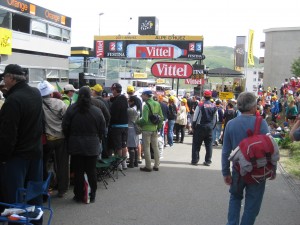
As nice as it was, the viewing area had one drawback compared to yesterday’s. It was not on the course. It made little sense for me to watch the race on TV when I was on the mountain, so as the racers neared the finish, I wandered down to the town to see what I could. Most of the others didn’t bother. I was not very optimistic; I figured the good spots would all be taken. However, I was able to squeeze in right next to the news photographers a few dozen feet past the finish line. I had to contort myself a fair bit but it was an outstanding view.
There was a jumbotron for us to watch, with live, loud commentary by a local announcer. It was all in French and impossible to understand. The camera spent a lot of time on Alberto Contador and I thought he was in the lead. So I was surprised to see a fellow in green come across the finish first. I had no idea who this was. I had to ask the fellow next to me who had won; with a look of disbelief, he answered: “Pierre Rolland.” His next comment: “Francais.” (French.) Even a fool like me needed to made aware that a Frenchman had won the stage! Sammy Sanchez followed, then Alberto Contador. Cadel Evans and Andy Schleck were in the front of the next group. They treated it like a sprint — thrusting their bikes forward over the finish line, trying to gain any advantage.
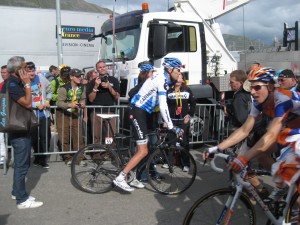
I was perfectly positioned to see the handlers come up and grab the bikes as each man finished. Generally they looked exhausted, unable to unclip from their bikes. One man who was close to the front and looked surprisingly fresh was Levi Leipheimer. Radio Shack had no chance for glory this time, so I guess he figured he could relax.
I am embarrassed to say I didn’t take any pictures of the celebrities. I just enjoyed the experience. I was next to the news cameras so they captured everything on far better equipment. This one shot shows how close I was.
This would be a good place to end the story. But, we still had to get back to the hotel. For those of us who had ridden up, that meant riding our bikes back down. One other woman had ridden up Alpe d’Huez, but she pleaded for a spot on the helicopter on the way back because she was afraid of the descent. The rest of us changed into fresh kit from our day bags and started out. It was 6:30pm by the time we began. The guides told us that there would be “a bit of a climb” with “rollers”.
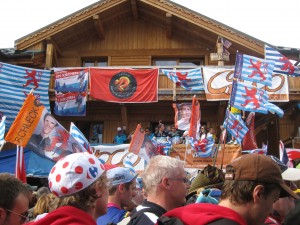
The mountain was completely jammed with party goers. I spent 10 minutes fighting my way through the crowd on this Luxembourg celebration (the Schleck brothers are from Luxembourg):
We went down to turn 15. The crowds made this a bit tricky, as did the hairpins. I went into the drops, pumped my brakes and didn’t run into too many problems. I learned later that some folks managed to melt part of their rims or had trouble squeezing the brakes for so long. Trek didn’t ensure that people knew what they were doing on these descents. Fortunately no one was hurt.
The turnoff on turn 15 was well hidden. There is a church there with some shops, but I would never have spotted the road without prompting. At first, this was rather beautiful, a hidden wooded route. Then it opened up into an even better view of the valley below. However, the climb had begun. We quickly discovered that it had been undersold. I couldn’t believe how slowly we were moving, and grabbed the Garmin. The grade was 9%, and getting steeper. We hadn’t eaten for 7 hours, and didn’t know how long this would be. Grumbling began. In the event, it was 6 miles of steady climbing, not a roller. I always have a squeeze bottle of Hammer gel with me, so I used that and didn’t bonk. Not in the mood to eat gel but it worked. Dinner was looking pretty attractive right now.
After the climb we did get to enjoy more miles of descent. We went to the pickup point, then had a 40-minute van ride back. By the time we had dinner, it was 10pm. This was a foolish failure on Trek’s part; we could easily have eaten more food before leaving the mountain.
Overall, it was a fantastic day and a great experience. The energy of the race and the challenge of the mountain came through loud and clear.
Tour de France, Day 2 – Le Chazelet and TDF Stage 18
Day 2: Col du Lautaret to Le Chazelet return. 20 miles. Total ascent: 4,721 ft
Today we had our first encounter with the Tour de France. Stage 18 came right by our hotel, which sits at the top of Col du Lauteret and at the base of Col du Galibier. As a result, we needed to finish our ride before noon, when the roads were due to close. The route, therefore, was shorter and steeper than yesterday.
The morning was cold, 30s or 40s. We are in the mountains and the weather can shift quite a bit. Knowing the uncertainty involved, I had packed a variety of clothing including a base layer and my Castelli wool jersey. Only one wool jersey, unfortunately, and I think I will be wearing it every day. The descents can be extremely chilly and last for many miles. Even the climbs are subject to some cold winds, though overheating is a more usual problem. I have brought along my saddlebag, which is large enough to hold my windbreaker, and switched between windbreaker on/off and long finger gloves on/off, it is not perfect but works fairly well.
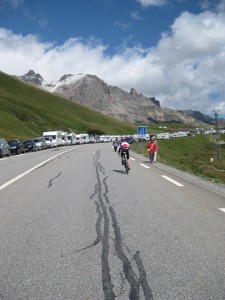
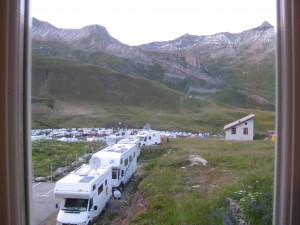
Our mountain was already crowded by 9am. People and cars were all over the road and getting through them was a challenge. The pedestrians were the worst, they would meander around the roads without even looking. Eventually we got through and began the descent to La Grave. I wish I’d had a helmet camera. It was an amazing scene with RVs from every country lining the road.
After reaching La Grave, we made a left turn and began the climb to Le Chazelet. This went along a balcony road, the ones that zig zag up along the side of the mountain. Once again, stunning views, and I took a large number of photos. The gradients were steeper than yesterday, getting into 10-11% for large amounts of time. That is fairly similar to Alpe d’Huez (I think) so it was good to get some practice. Overall very manageable, though I did not set any speed records.
Once again, most of the group turned around early — not sure why they keep doing this! — but I pushed on to Le Chazelet and met up with a few others. Had an enjoyable cup of tea with Jenny and Gerald at an outdoor cafe.
We came back by reversing our route. This meant that we did the same climb from La Grave that we did yesterday. It felt much easier today. I had finally gotten some good sleep last night and the jet lag is over. By this time people were walking up the mountain to find a place to view the peloton, and many bikers were heading up as well. Thankfully the road was now closed to cars, though some would still come through now and then, plus the occasional bus would lurch into view and force everyone off to the side. Near the end I found a vendor with children’s bike shirts and I was able to buy two of them with team designs for my girls.
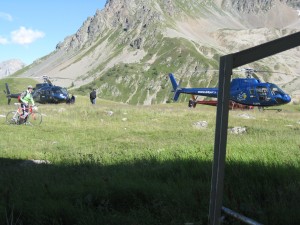
After taking a shower it was time for lunch. This was a buffet provided by the hotel, which did an outstanding job here and for today’s breakfast. Hotel Bonnabel was also the best location to see this stage of the tour. My room faces a field behind the hotel and helicopters were landing a few dozen feet in front of my window all day. Most of them were marked official “Tour de France” and one was labelled “VIP 1” but I never saw the celebrities they carried.
Stage 18 was a decisive one in the Tour this year. Andy Schleck broke away from the pack and gained a large lead over his rivals. The route they took included the climb from Briancon to Col du Lauteret that we had done yesterday. Unlike us, they then continued up Galibier (which we will tackle on Saturday). There were several options for watching the riders go by. There was a large teleprompter set up outside, so it was possible to watch the television coverage of the Tour (in French) while waiting out there. There were drummers, flags, people in funny costumes, and a general party atmosphere. At first I found a spot right on the road, behind one of the metal barricades. Something I had not appreciated from the television coverage at home, this event is a big advertising opportunity for French companies. They had cars drive by us with floats and people throwing swag into the crowd.
I stayed out here for an hour, but decided that the Trek viewing site would be better. It was a few feet back from the road but high up, so no one could block the view. And that is where I saw Andy Schleck fly by to begin his triumphant solo climb up Galibier. (If you can’t see the video below, click here.)
I also saw Cadel Evans, a few minutes later. Alas. I had hoped that Cadel might win this year. (Which is exactly what he went on to do. But at the time, with such a large gap and Alpe d’Huez seeming likely to increase it, I thought he was doomed.)
After the first sets of riders had come by, I went into the Trek tent to watch the TV coverage in slightly warmer air. The president of Trek, John Burke, was there. He was cheering on Andy Schleck quite heartily, as Andy is a member of the Leopard Trek team. Frank Schleck also had a memorable performance.
Trek Travel certainly came through on their promise to get us to the heart of the action for the Tour.
Bonus: After dinner, John Burke and Ben Coates (the head mechanic at Trek) stopped by to answer questions. This was pretty interesting. Among the topics: DI2 electronic shifting will get more affordable, major changes in road bike tech are coming in the next 3 years, aero road bikes are not worth it, best power to weight numbers are/were Cancellara and Armstrong. Tom Boonen has one of the highest power numbers overall but he weighs a lot. Tour winners need to be able to do 6.5-7 watts/kg for 30 minutes.
Tomorrow we get up bright and early for Alpe d’Huez, which we will be riding ahead of the peloton. Now that will be a crazy scene. I can’t wait.
Tour de France, Day 1 – Col du Lautaret
Day 1: La Grave to Col du Lautaret with Briancon Return. 30 miles. Total ascent: 5,643 ft
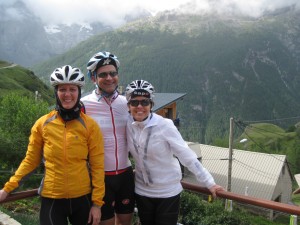
Today we met our guides and fellow riders in Grenoble. There are roughly 15 people in our group. There are 5 women, 3 of whom are riding, and except for me they are all with their husbands. Thanks to that fortunate circumstance, I have no roommate. Our guides are all women, roughly my age, and beautiful.
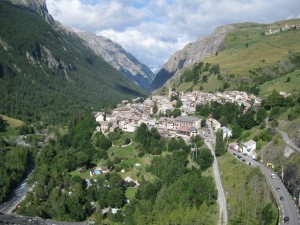
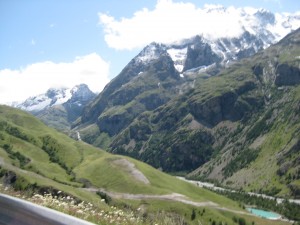
Grenoble was raining and cold when we awoke. Our first step was a 90-minute bus ride to La Grave. As soon as we left the city, the sun broke through and the French Alps came into view. They did not disappoint. It is hard to describe them without using cliches. They remind me of the Swiss mountains, but much closer, and daunting when you know that you will be climbing them soon. The images on Versus do not do them justice.
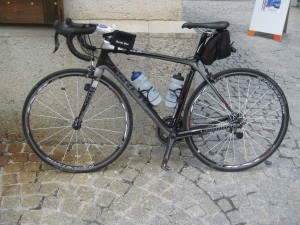
We had lunch in a creperie in La Grave; I had a galette (non-sweet crepe) with ham, cheese, mushrooms, and egg. It was a tasty meal. Then we went to get our bikes fit. I am pleased with the bike they gave me. I ride a 6.5 Madone at home, and having access to one here was a motivation for choosing this tour company. It had a compact double, the same as mine.
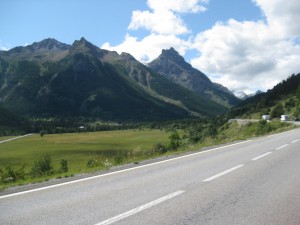
The ride started immediately with a 10-mile climb up Col du Lautaret, at grades that were generally between 7-9%. The guides warned us not to get distracted by the view; it was easy to do! The mountains surrounded us, and there were stunning vistas at every turn. Not just at the top of a hill or at certain moments…the views were there throughout the ride. If America looked like this everyone would ride a bike.
We reached our hotel at the top of Col du Lautaret, but continued past it down the other side. This was a glorious descent. The roads are fairly well maintained here, although guardrails are missing and one had better enjoy heights! You could ride down as far as you wanted, then turn around and go back to the hotel. I took the longest cued route, for a total of 30 miles, because it was just too much fun. I later learned that almost everyone else had turned around early, at Le Monetier-les-Bains. It was rather a long way back! But my legs were fresh and the view inspirational, I enjoyed it tremendously.
The Tour de France will come through here tomorrow, and the RVs are already lining the roads. There were also a great number of cyclists on the road, though not so many women. Cars were accomodating and I received various words of encouragement and calls of “allez, allez”. I’m told that Alpe d’Huez will be a real experience with crowds, with people spontaneously pushing you up the hill as you ride.
The police have closed various roads in preparation for the Tour and they are rather capricious in their decision making at times. This has forced some changes to our itinerary. Tomorrow we were supposed to do 50 miles. However, we must get back to the hotel by noon before the road closes. So our route will be a different one, and only 20 miles long. It must be said that the profile looks quite steep, but still, that seems awfully short. The following two days will be much longer, though, so taking it easy before climbing Alpe d’Huez may be a good idea. The focus of tomorrow will be the passage of the Tour through here on their way up Galibier.
We had dinner at a brasserie next to the hotel, with fondue, mushroom soup, cold cuts, chicken, and blueberry pie. It’s almost impossible to mess up fondue and the cold cuts were decent, but the rest of the meal was very disappointing. The hotel has its quirks, with no chest of drawers and no internet access. This is minor though if the riding is good. I’m looking forward to the next two days.
A personal Tour de France
In 2007 I began road cycling. I quickly fell in love with the sport and made lots of wonderful friends. I also began watching the Tour de France each July, an epic three-week bike race. It is probably the best-known bike race in America, thanks to Lance Armstrong, who won it a record-breaking seven times. It is well designed for television coverage, with beautiful countryside, a variety of stages — flats for the sprinters, mountains for the climbers, multiple prize categories, and dramatic battles between several sets of contenders. Each year I set the TiVo and watch most of the stages, often with my daughters as well.
I eventually decided that I wanted to participate more directly, and began to research. Last fall I signed up with Trek Travel for one of their Race France packages. Trek has a team in the race (Leopard Trek) and they have Madones for riding, the same type of bike that I use. They also have nice options for viewing the Tour, meeting riders, and different weeks of the race. There were well over a dozen choices. After a lot of thought, I chose one that was in the Alps, had several race finishes for us to see including the grand one in Paris, and four days of riding.
To prepare, I hired a coach and began training 5 days a week. This was a good investment, as my recreational cycling immediately began to improve. I was able to do events I could not have done before, such as the hilly Mountains of Misery. Although my primary focus was on climbing, the training helped with the flats as well, as I discovered at the Bay to Bay Century where I finished with an 18.7 mph average (helped by a strong paceline). The only disadvantage is that this cut into my social riding, as I had to stick with prescribed workouts most of the week. And it’s the main reason the LED stairs took so long to finish!
Exactly two weeks ago I sprained my left ankle. It was unable to tolerate any weight on it and I thought the trip might be over. Fortunately nothing was broken, and after a week off the bike I was able to ride again. I am not fully healed. But cycling seems pretty painless now — unlike walking — so it will do. I am using SpiderTech pre-cut tape, and that seems to help.
Tomorrow morning we meet our guides in Grenoble, then shuttle to Bourg d’Oisans for a bike fit and the first ride. We will be tackling the Col du Lauteret. This day is only 25 miles, but with 6,500 feet of climbing. Hopefully there will be a little bit of flat to warm up, as with all the travelling I haven’t been on a bike since Sunday! I am eager to get started.
LED stair video and how-to
For everyone who has contacted me regarding the automatic LED stair project, good news: the official instructions page is now available.
Here is the video of me using the stairs. Movie making is not my greatest strength, but I think this gives an idea of what the stairs can do. They are beautiful. I am using a simple lighting sequence here, however it is possible to program any sequence of your choice. Each controller board can handle up to 34 LEDs. As the saying goes, “The only limit is your imagination.”
If you cannot see the embedded video, click here.
As I expected, the final installation of the lights was a bit difficult. I wanted recessed, professional looking lights and not something taped to a wall. While I drilled most of the holes myself and did the terminations, I ended up hiring a professional to help with snaking the wires through the walls. This was the right decision. It added significantly to the project cost, which is something that other DIYers should be aware of. (I used 2 hours of his time; your mileage may vary.)
I’m thrilled with how the stair lights turned out. They provide an unique touch for our home, and my family has already found them very useful.
